AI can help us pick awesome colors from any image we give it! It looks at all the shades and suggests a palette that just feels right, which is super handy if color theory isn’t one of your developed skills.
We can use colors from a target image to make your app look even better! Think of the main color becoming a fun highlight, and the other colors making everything else look balanced and easy on the eyes.
To do this, we pop those AI-picked colors into our code. Before doing so, we preview them by using AI to apply the suggestion and see what looks best. A little tweaking here and there, and boom – your app gets a fresh, stylish look inspired by your chosen image!
Start with a Color
Have AI suggest a color palette for you.
Use an image. In this example a solid color is used. But it could also be a logo, photo, etc.

Use a Prompt
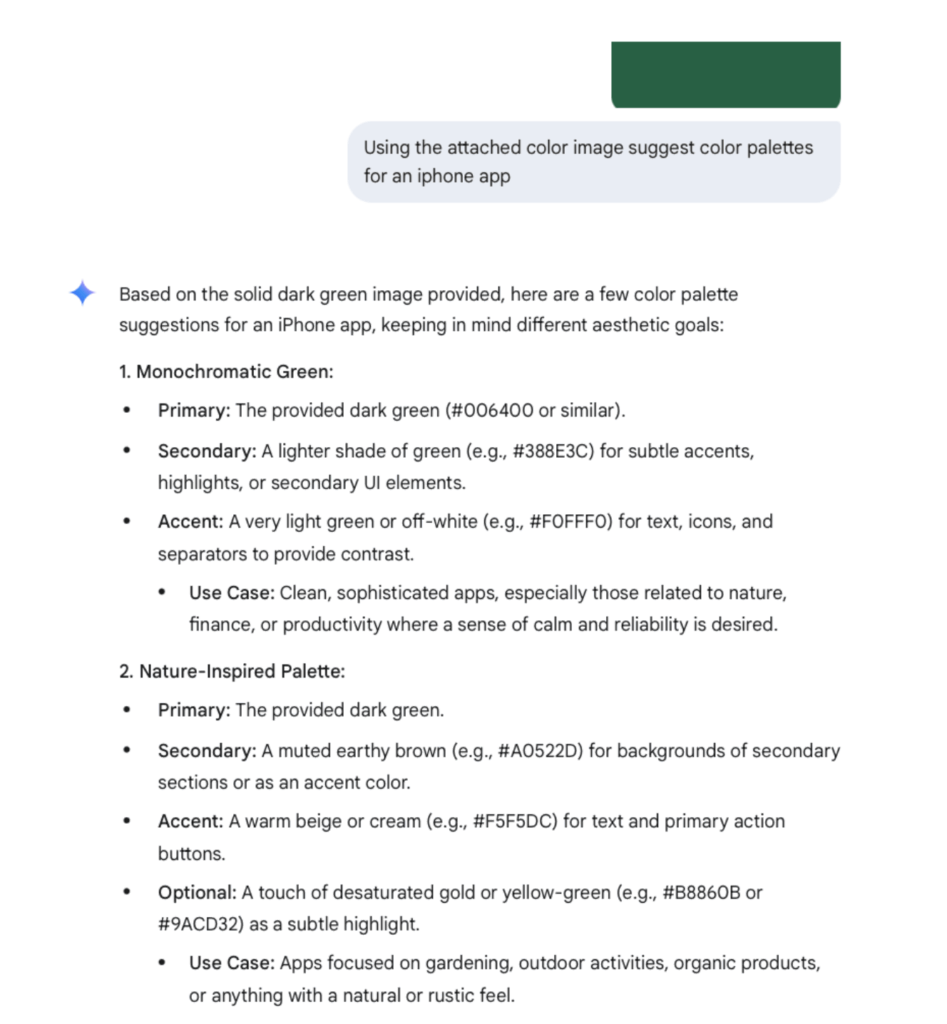
Using the attached color image suggest color palettes for an iphone app.Combine in a GenAI Platform
In this example, I am using Google Gemini.
It probably works with any of the major platforms out there.
The results shown below were truncated for brevity.
Gemini returned 5 palettes!
Try it out on your code!
Choose any one of the palette names that resulted from your prompt result and copy your code into the prompt below.
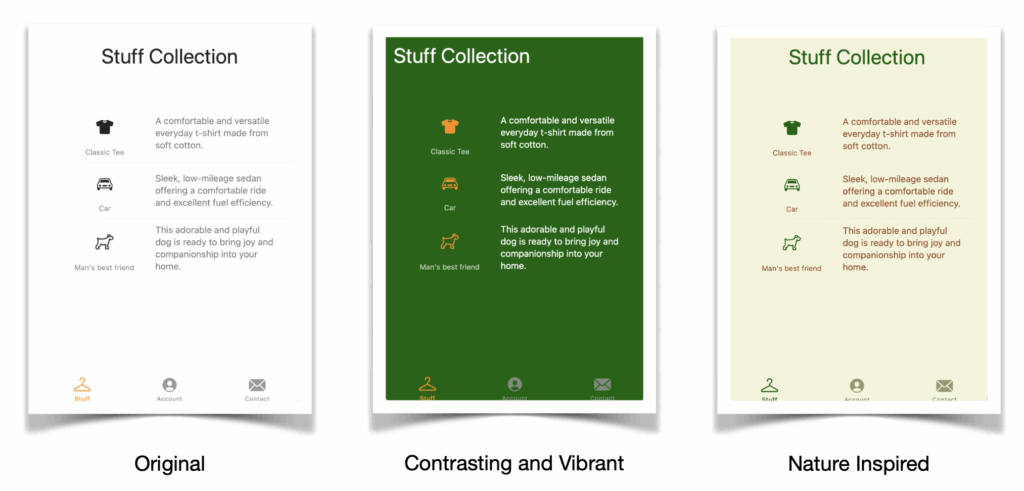
The Nature-Inspired palette is used in the example.
Copy the Sample Code at the end of this article into the prompt.
Apply Palette to your Code
Enter a palette name. Paste your code into the prompt.
Apply <pick one of the palette names> palette to swiftui code.

swiftui code:

<paste your code here>
Sample Code
import SwiftUI

struct ContentView: View {
    var body: some View {
        TabView {
            NavigationView {
                VStack {
                    Text("Stuff Collection")
                        .font(.largeTitle)
                        .padding()

                    List {
                        StuffRow(
                            imageName: "tshirt.fill",
                            caption: "Classic Tee",
                            description: "A comfortable and versatile everyday t-shirt made from soft cotton."
                        )
                        StuffRow(
                            imageName: "car",
                            caption: "Car",
                            description: "Sleek, low-mileage sedan offering a comfortable ride and excellent fuel efficiency."
                        )
                        StuffRow(
                            imageName: "dog",
                            caption: "Man's best friend",
                            description: "This adorable and playful dog is ready to bring joy and companionship into your home."
                        )
                    }
                }
                .navigationTitle("") // To hide the default navigation bar title
                .navigationBarHidden(true)
            }
            .tabItem {
                Label("Stuff", systemImage: "hanger")
            }

            Text("Account View")
                .tabItem {
                    Label("Account", systemImage: "person.crop.circle.fill")
                }

            Text("Contact View")
                .tabItem {
                    Label("Contact", systemImage: "envelope.fill")
                }
        }
    }
}

struct StuffRow: View {
    let imageName: String
    let caption: String
    let description: String

    var body: some View {
        HStack {
            VStack(alignment: .center) {
                Image(systemName: imageName)
                    .font(.title2)
                    .padding()
                Text(caption)
                    .font(.caption)
                    .foregroundColor(.gray)
            }
            .frame(width: 150)

            Text(description)
                .font(.subheadline)
                .foregroundColor(.secondary)
                .multilineTextAlignment(.leading)
            Spacer()
        }
        .padding(.vertical, 8)
    }
}

struct ContentView_Previews: PreviewProvider {
    static var previews: some View {
        ContentView()
    }
}
Pro Tip
When you settle on the palette you want, convert it to a color set and place it in your Assets folder for reference.